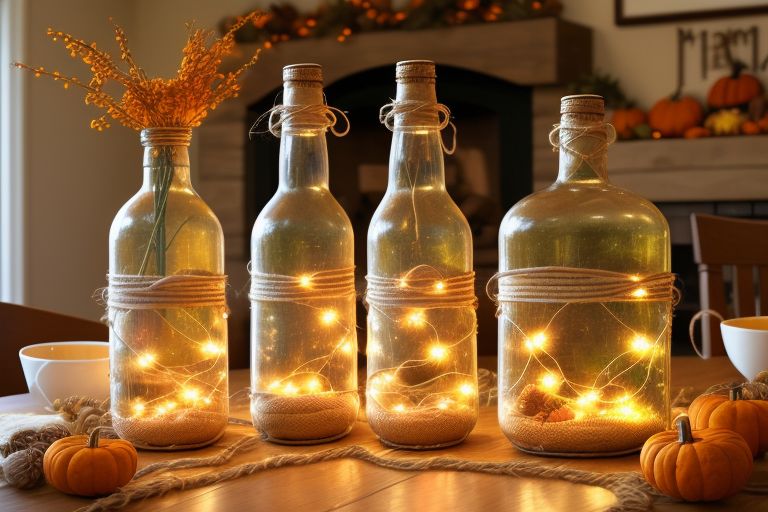
Creating your own Thanksgiving decorations can be fun, especially when you use items you might already have at home! One simple way to add a warm, festive glow to your Thanksgiving table or home is by making ambient lighting from old bottles. This project is easy, affordable, and gives you a chance to get creative. Let’s dive into making some beautiful bottle lights for Thanksgiving!
What You’ll Need
To make bottle lights, gather these simple supplies:
- Empty glass bottles (wine bottles, soda bottles, or any interesting shape you like)
- A string of battery-operated LED fairy lights for each bottle (look for warm white or amber to create a cozy effect)
- Optional decorations: twine, fake leaves, mini pumpkins, fall-themed stickers, acrylic paint
- A small paintbrush or sponge, if you plan to paint
- Scissors
Once you have all your materials, you’re ready to start creating your Thanksgiving bottle lights!
Step 1: Clean and Prepare Your Bottles
Start by cleaning your bottles. Remove any labels by soaking them in warm, soapy water for about 20 minutes. This will loosen the labels, making it easier to peel them off. Rinse your bottles and let them dry completely before moving on. Clear glass works best for this project because it lets the light shine through, but tinted bottles can add a unique look as well!
Step 2: Decorate the Bottles (Optional)
If you want to make your bottles more festive, now’s the time to decorate! Here are a few ideas:
- Twine Wrap: Wrap twine around the neck of the bottle and tie it in a bow for a rustic look.
- Fall Stickers: Stick some fall-themed stickers or cutouts, like pumpkins, leaves, or turkeys, onto the outside of the bottle.
- Painted Designs: Use acrylic paint to add your own designs, such as leaves or dots, around the bottle. You don’t have to paint the whole thing—just a few details can add a special touch.
Make sure the decorations don’t block too much of the bottle’s surface so the lights can shine through. Give the paint time to dry if you use it.
Step 3: Add the Fairy Lights
Once your bottle is ready, take your fairy lights and gently feed them into the bottle. You might have to adjust them a bit to spread the lights out evenly. Leave the battery pack outside the bottle so you can turn the lights on and off easily. If the battery pack is distracting, you can tuck it behind the bottle or use a bit of tape to keep it hidden.
Step 4: Arrange Your Bottles
Place your bottle lights around the house or use them as a centerpiece on your Thanksgiving table. Try grouping several bottles together for a bigger impact, or mix them with pumpkins, pinecones, and small gourds to create a beautiful fall-themed arrangement.
Step 5: Light Up and Enjoy
Now for the fun part—turn on your lights and enjoy the warm, ambient glow! These bottle lights are perfect for adding a cozy feel to your home on Thanksgiving, and they make a great conversation starter. Plus, after Thanksgiving, you can keep them up for the rest of fall or even through the winter by adjusting the decorations.
Making bottle lights is a fun and easy project that brings warmth to your home for the holidays. With a few simple supplies, you can create a decoration that’s both beautiful and eco-friendly. Happy crafting and have a wonderful Thanksgiving!


